How to Make a Responsive Menu Bar That is Fixed in 4 Steps!
Responsive Menu Bar allows website visitors to navigate smoothly within your website and quickly find the result they are looking for. However, most of the free themes that a website comes with by default lack a Responsive Top Navigation Menu.
Top Navigation Menu in the form of a Menu Bar is a must-have on every website. A responsive top navigation menu makes for a richer browsing experience which in turn helps a site acquire its users’ trust.
Website owners tend to always overlook this on their part and it causes them heavy with lower visitor traffic, less visitor engagement, and high bounce rates.
There is always more to lose on your side, so it becomes essential to work on your website’s navigation menu and provide the users with the best experience.
To improve on your navigation menu you need to have coding experience or else if needed you will have to hire a professional developer to build a custom menu for your website.
However, if your website runs on WordPress CMS then you need not worry as you can incorporate a brand-new navigation menu using Responsive Menu Plugin without you writing a single line of code.
In this article, I have discussed how you can build a Responsive Top Navigation Menu in the form of a Fixed Menu Bar using the popular Responsive Menu WordPress Plugin.
How to Build a Fixed Responsive Menu Bar
Build the navigation menu in 4 easy steps
#1 Purchase Responsive Menu Pro
#2 Create a New Responsive Menu
#3 Enable a Header Bar
#4 Adjust Appearance of the Header Bar
Step 1: Purchase Responsive Menu Pro
Responsive Menu is a Free Plugin used to build a Mobile Responsive Menu, it can be downloaded from the WordPress Plugin repository for free but to build a Custom Desktop Menu or a Responsive Header Bar you need to have Responsive Menu Pro.
There are three variants of Responsive Menu Pro available for single, 2-5, and 100 sites respectively. Choose the one that suits your budget and requirement.
So, the very first step is to download the Responsive Menu Pro from the Responsive Menu Website.
Step 2: Create a New Responsive Menu
After purchasing and installing the Responsive Menu Pro Plugin, navigate to the Responsive Menu and hit the Create New Menu Button. Choose any of the listed Responsive Menu Free themes to start with and hit “Next”.
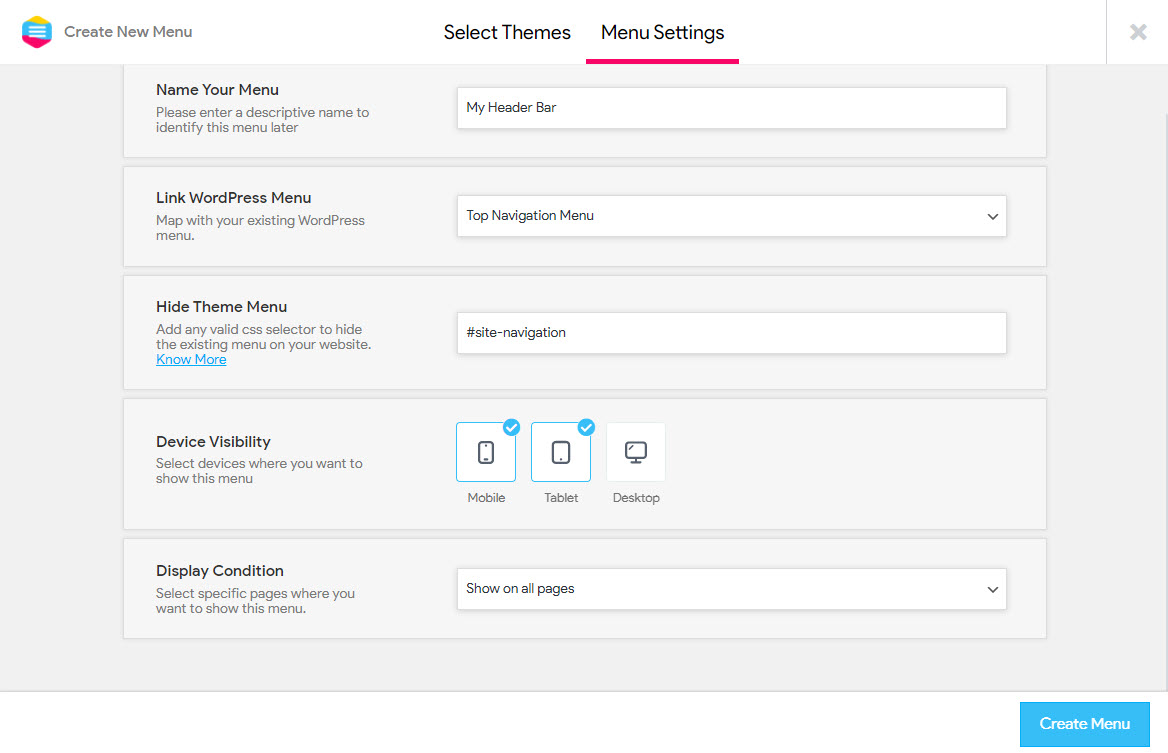
In the next card, you will be asked to set the Menu Settings like:
- Adding your Menu Name
- Link to Existing WordPress Menu
- Hide Theme Menu by adding CSS selector
- Set Device Visibility on Mobile, Tablet, and Desktop Devices
- Choose Display Condition of where to display the menu.
Read: How to Add Menu in WordPress? 3 Useful Methods You Must Know!
By adding this information you will have a new Menu Created which you can Customize and Style further as per your requirement. Hit the “Create Menu” button and the menu will be created.
Step 3: Enable a Header Bar
After creating a New Responsive Menu, you can see that all of your previously created WordPress menus have now moved and aligned in a much neat and eye-pleasing manner inside the hamburger menu icon.
When the visitor clicks the hamburger menu icon(three horizontal lines) the menu opens up and the contents are displayed.
Depending on the visibility you chose the menu will be displayed on the respective devices however you can alter the menu visibility by heading to Settings > General Settings > Device Visibility.
You can customize the Mobile Responsive Menu by adding Title (Text/Image/Link), Adding additional supporting content or hyperlinks, Displaying a Search field, and then styling its appearance.
So, this was all about Mobile Menu, now to add a Header bar on your website you need to Enable Header bar from Header Bar > Enable Header Bar, toggle the button and the header bar will be enabled.
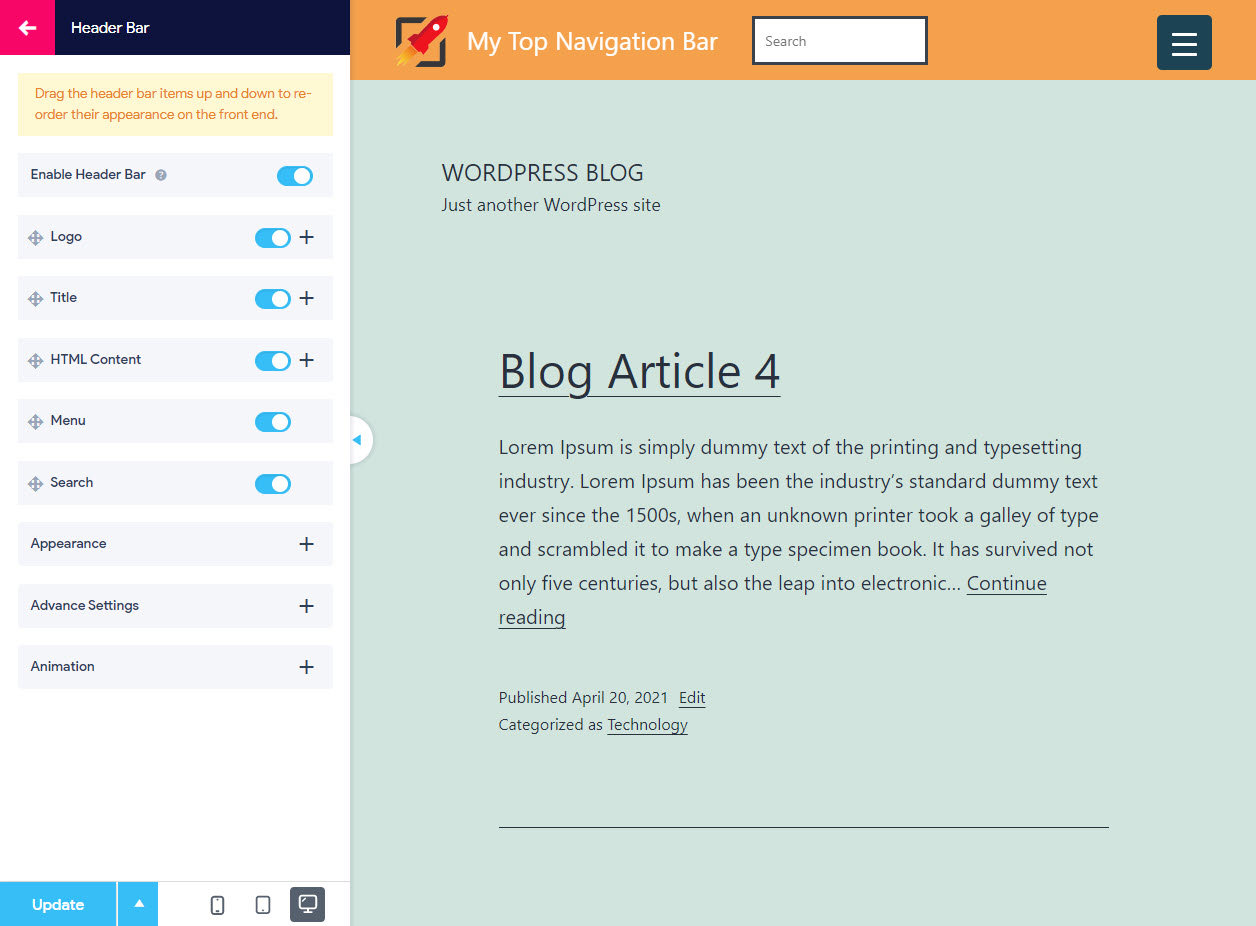
You also want to add a Logo to the header bar so for that click Logo and choose the logo from WordPress Media Library and toggle the button to enable it.
Likewise, you can add a title text which most probably will be your website name by enabling the title. Even add custom HTML like hyperlinks with direct links to pages, or other useful content.
Read: How to create a personality quiz in WordPress [9 Simple Steps]
Add a search bar, it will let the users search for content they are looking for directly from the page they are on without manually navigating to each page.
Step 4: Adjust Appearance of the Header Bar
Once, the header bar contents are confirmed you can now focus on making the header bar look more beautiful and sync it with your website’s appearance.
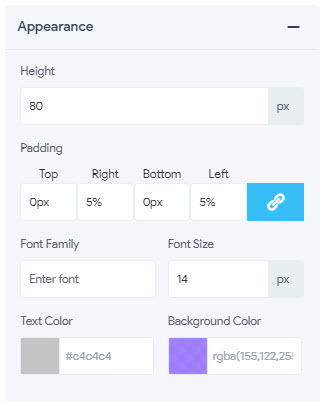
To improve the header bar appearance, we have the appearance section. It consists of:
- Height – Adjusting the height of the header bar, by default the height is set to 80px however you can change it to any size depending on your requirement.
- Padding – Let’s you adjust the header bar padding in all the directions.
- Font Family – This Lets you choose the font family to be used on the Header bar.
- Font Size – This lets you adjust the Font Size of all the text used on the Header Bar.
- Text Color – Set the Text Color to any color and also adjust the transparency using alpha controls.
- Background Color – Set the Header Bar background color to any color and also adjust the transparency using alpha controls.
If you think of enabling a different scrolling color to the header bar, in other words changing the header bar background on scrolling the page. You can surely do so using the Animation Option, this opens up a color picker using which you can add a custom scrolling color to the header bar.
Also to make sure the Header bar remains at a fixed position you need to set its positioning to Fixed from the advanced settings. Using the advanced settings you can set a breakpoint by which you can show the header bar below set screen resolution.
After making all the required changes hit the “Update” button and save your progress and make it live on your website.
Conclusion
This is how you create a Responsive Menu Bar That is Fixed to its set position. Using Responsive Menu you can do customize your menu even further and build a full-fledged Megamenu.
Responsive Menu Pro supports 600+ Font Icons from FontAwesome and Glyphicons that can be used on your menu for free.
Responsive Menu also is fully integrated with WPML and Polylang if you have a multilingual website thus building a multilingual menu is now supported.
Read: Responsive Menu v4.1.2 Introduces Dark Mode Feature
Also, with Responsive Menu Pro, you can let your users control and navigate through your website’s menu with touch gestures and keyboard shortcuts. Learn more about Responsive Menu Pro’s features and many others.